
Cleaning your Ninja Air Fryer Oven requires just a few simple, safe steps. Always unplug the unit before you begin. Let it cool completely to avoid burns. Start with the removable accessories. Wash them in warm, soapy water. Rinse well and dry thoroughly. Next, use a damp, non-abrasive sponge to wipe it down. Clean the glass door the same way. Never use steel wool or harsh chemical sprays. For tough, baked-on grease, baking soda paste works best. Apply it to the greasy area. Let it sit briefly, then wipe clean. Dry every component completely before putting the unit back together. Before cleaning your Ninja model, it’s helpful to understand the general process of cleaning an air fryer oven the right way.
TL;DR
- Remove and hand-wash the crumb tray, wire rack, and sheet pan after every use – these are the parts that collect the most grease.
- The interior walls only need wiping down with a damp cloth – never submerge the main unit in water.
- Use dish soap and warm water for most parts; avoid abrasive scrubbers that scratch the non-stick coating.
- Baked-on grease comes off with a 15-20 minute soak in warm, soapy water – no harsh chemicals needed.
- A full deep clean takes about 20-30 minutes and should happen every 5-10 uses, depending on how much you cook.
 What You Need Before You Start
- Dish soap (standard, not industrial-strength)
- Warm water
- A non-abrasive sponge or soft cloth
- A small brush (an old toothbrush works well for vents and tight spots)
- A dry microfiber towel
- Baking soda (optional, for stubborn grease spots)
- Paper towels
What to avoid: Steel wool, metal scrubbers, abrasive cleaning powders, and oven cleaner sprays. These strip the non-stick coating on Ninja air fryer oven components, which cannot be restored once damaged.
Unplug the unit and let it cool completely before cleaning. Most Ninja air fryer ovens reach internal temperatures above 400°F (204°C), and residual heat lasts 20-30 minutes after use (Ninja, 2024).
Step 1: Remove All Removable Parts
Pull out every removable component before you touch anything else. On most Ninja air fryer oven models, this includes:
- The crumb tray (slides out from the bottom)
- The wire rack
- The sheet pan or baking pan
- The air fry basket (if your model includes one)
Set each part on a clean towel or your countertop. Removing everything at once lets you clean the interior properly and prevents you from missing grease hiding underneath the tray.
Step 2: Wash the Removable Parts
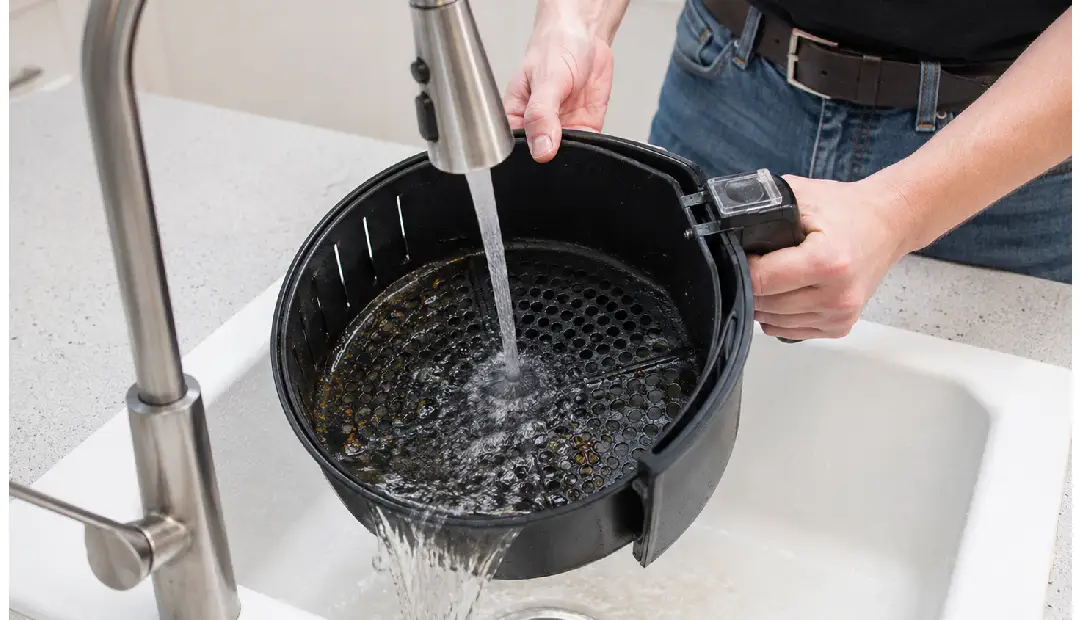
Fill your sink with warm water and a few drops of dish soap. Submerge the crumb tray, wire rack, and sheet pan and let them soak for 10-15 minutes if there is baked-on residue. If the grease is light and fresh, no soaking is needed.
Scrub each part with a non-abrasive sponge. Pay attention to the wire rack corners and the edges of the crumb tray – grease collects in those spots every time you cook.
Rinse thoroughly and dry with a microfiber towel before putting anything back. Leftover water sitting on metal components can cause rust on some Ninja models over time.
Dishwasher note: Check your specific model’s manual. Some Ninja air fryer oven accessories are dishwasher-safe on the top rack, but repeated dishwasher cycles can degrade non-stick coatings faster than hand washing (Ninja, 2024).
 Step 3: Clean the Interior Walls and Heating Element Area
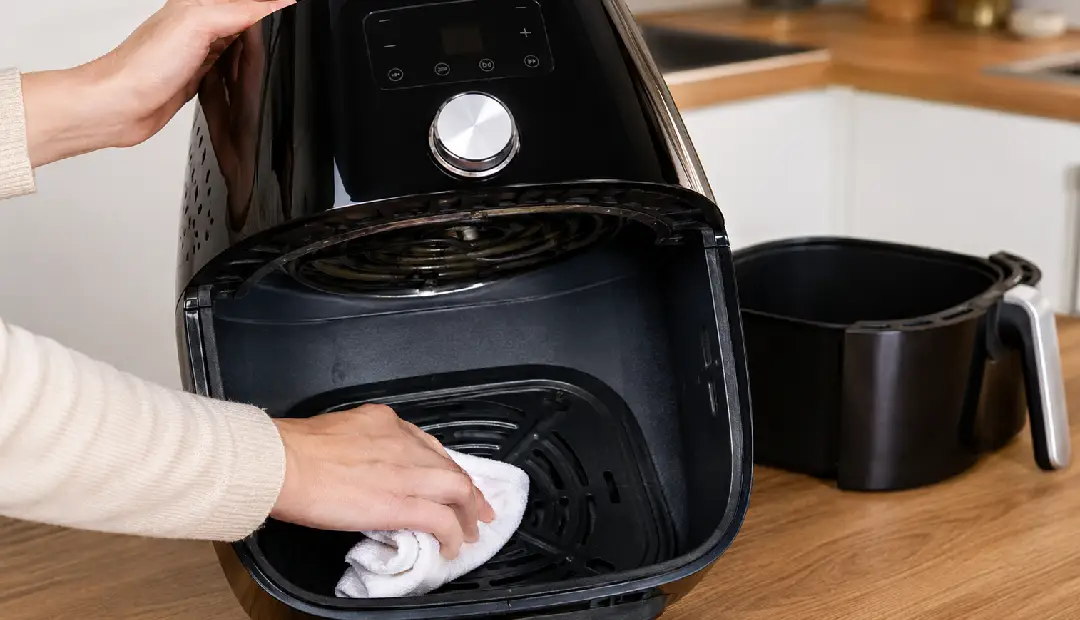
Wipe down the interior walls with a damp cloth or sponge. Work from the top down so any drips fall to the bottom, where you can wipe them up last.
For grease spots on the walls, apply a small amount of dish soap directly to your sponge and scrub gently. Rinse the sponge and wipe the walls again to remove soap residue.
Do not spray water or cleaning solution directly into the unit. The heating element and fan motor are at the back and top of the oven. Getting them wet can damage the appliance and create a safety issue.
For the heating element itself: use a dry brush or barely damp cloth only. Do not apply soap or any liquid directly to it.
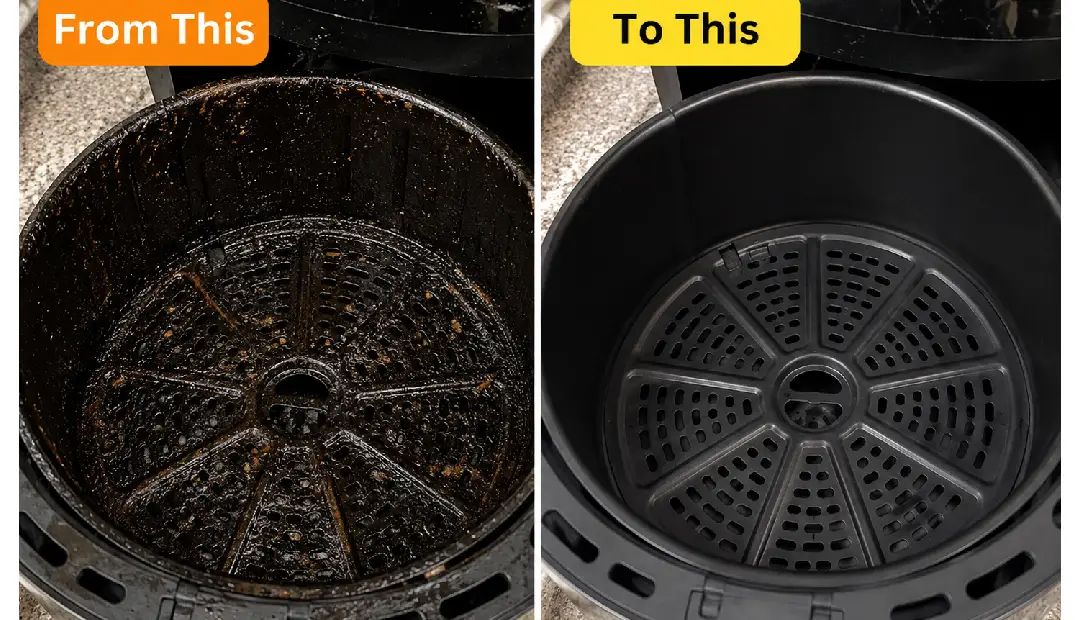
Step 4: Remove Stubborn Baked-On Grease
If standard soapy water does not shift hardened grease on the interior walls, make a paste from baking soda and a few drops of water. Apply it to the problem area, let it sit for 5-10 minutes, then scrub with a soft brush and wipe clean with a damp cloth.
For the removable accessories with heavy buildup, extend the soak time to 20-30 minutes before scrubbing. Most baked-on grease will release with time and warm water – you do not need chemical degreasers.
Avoid vinegar on non-stick coatings. Acidic cleaners break down the coating faster over repeated use, which shortens the lifespan of the parts.
Step 5: Clean the Exterior and Door Glass
Wipe the outside of the unit with a damp cloth. If there are grease splatter marks on the exterior, a small amount of dish soap on the cloth removes them.
For the door glass: clean both sides. The inside of the glass collects grease steam every time you cook. A damp sponge with dish soap works on both the inner and outer glass surfaces. Dry thoroughly with a microfiber towel to avoid streaks.
The door hinges and seal areas pick up grease over time. Use a small brush or toothbrush to get into those edges.
Step 6: Dry Everything and Reassemble
Every part must be fully dry before you put the unit back together. Moisture trapped between the crumb tray and the bottom of the oven can cause odors or, in rare cases, affect electrical components.
Dry each part with a towel, then leave them on the counter for 10-15 minutes to air dry fully before reassembling.
Slide the crumb tray back in, replace the wire rack and sheet pan, and close the door. The unit is ready for its next use.
 How Often to Clean Your Ninja Air Fryer Oven
| Cleaning Type | How Often | Time Required |
|---|---|---|
| Crumb tray and accessories | After every use | 5-10 minutes |
| Interior walls | Every 3-5 uses | 10 minutes |
| Full deep clean (all steps above) | Every 5-10 uses | 20-30 minutes |
| Exterior and door glass | Weekly or when visibly dirty | 5 minutes |
Skipping the crumb tray after every use is the most common mistake. Accumulated crumbs and grease on the tray are the main source of smoke during cooking. If your Ninja air fryer oven smokes during use, a dirty crumb tray is almost always the cause (Ninja, 2024).
Common Cleaning Problems and How to Fix Them
| Problem | Likely Cause | Solution |
|---|---|---|
| Smoke during cooking | Grease buildup on crumb tray or heating element | Clean the crumb tray and wipe the interior walls |
| Lingering food odors after cleaning | Grease residue on interior walls or rack | Re-clean with baking soda paste; run the unit empty at 300°F for 5 minutes |
| Non-stick coating peeling on accessories | Abrasive scrubbers or harsh chemicals used | Switch to soft sponges; replace the part if coating is already damaged |
| Water spots on interior walls | Wiping with too-wet cloth | Use a damp cloth, not a soaking-wet one; dry immediately after wiping |
| Grease not coming off the wire rack | Not soaking long enough | Soak for 20-30 minutes in warm soapy water before scrubbing |
Frequently Asked Questions
Can I put my Ninja air fryer oven parts in the dishwasher?
Some accessories are dishwasher-safe, but not all. Check the manual for your specific model. The crumb tray and sheet pan on many Ninja air fryer oven models are listed as dishwasher-safe for the top rack. The wire rack varies by model. Hand washing is always the safer option for preserving the non-stick coating.
How do I get rid of the burnt smell from my Ninja air fryer oven?
The burnt smell almost always comes from grease residue. Clean the crumb tray, wipe down the interior walls, and clean the wire rack. After cleaning, run the oven empty at 300°F for 5 minutes with the door closed to burn off any remaining residue. Leave a window open or use the range hood fan while doing this.
Can I use oven cleaner spray inside my Ninja air fryer oven?
No. Oven cleaner sprays contain harsh chemicals, including lye (sodium hydroxide), that damage the non-stick interior coating of Ninja air fryer ovens. Use only dish soap and water for routine cleaning, and baking soda paste for stubborn spots.
Why does my Ninja air fryer oven smoke when I cook?
Smoke is almost always caused by grease on the crumb tray or interior walls. Clean the crumb tray after every use. If smoke continues after cleaning, check for grease buildup near the heating element area and wipe it with a barely damp cloth.
How do I clean the heating element in my Ninja air fryer oven?
Do not apply water or soap directly to the heating element. Use a dry brush or a barely damp cloth to remove any visible buildup. The heating element is self-cleaning to some degree – running the oven at high heat burns off light residue over time.
Is it safe to clean the interior walls while the oven is still warm?
No. Always unplug and allow the unit to cool completely before cleaning. Most Ninja air fryer ovens take 20-30 minutes to cool to a safe handling temperature after use.
How do I prevent grease buildup between deep cleans?
Wipe down the interior walls with a damp cloth after each use, before grease has time to harden. Empty the crumb tray every time. Lining the crumb tray with aluminum foil is another option – just make sure the foil does not block the tray’s ventilation slots.
 Quick Recap: How to Clean a Ninja Air Fryer Oven
- Remove all parts first, then soak accessories in warm soapy water for 10-15 minutes.
- Wipe interior walls with a damp sponge from top to bottom; never spray water directly inside.
- Use baking soda paste for stubborn grease spots – no harsh chemicals or abrasive scrubbers.
- Dry everything fully before reassembling to prevent odors and rust.
- Clean the crumb tray after every use to stop smoke from building up during cooking.